Wednesday, February 27, 2013

favorite chocolate chip cookies

I have got WAY too much going on right now!  I'm in the middle of a front porch makeover, which has to be finished by next weekend when we replace our terrible crabgrass with some lovely new sod (can't wait).  Anyway, all my naptime hours are being dedicated to my "new" porch so that leaves me no time to blog.  I'll be back soon with some fun posts on all my recent projects, but for now, I did make time to throw together a batch of my FAVORITE cookies - good old fashioned chocolate chip.  I've tried EVERY recipe out there (well, almost every recipe) and this is my PERFECT cookie.  I like a nice fat, chewy, chocolatey cookie (if you like crunchy and flat this isn't the recipe for you).


Here's what I've come up with.

INGREDIENTS
2 cups flour
1/2 teaspoon baking soda
1/2 teaspoon salt
3/4 cup melted butter (I swear by tillamook unsalted sweet cream)
1 cup packed brown sugar
1/2 cup white sugar
1 tablespoon vanilla extract
1 egg + 1 egg yolk
2 cups chocolate chips (I use ghirardelli milk chocolate)

DIRECTIONS
~ Preheat oven to 325 and line cookie sheet with parchment paper
~ Combine flour, baking soda and salt
~ In the bowl of your mixer, cream melted butter, brown sugar and white sugar 
~ Beat in vanilla, egg and yolk until creamy
~ Add the dry ingredients until blended
~ Stir in the chocolate chips by hand
~ Drop heaping tablespoons of dough onto your prepared cookie sheet
~ Bake 14 minutes (may depend upon your oven) or until only slightly brown

Try not to eat them ALL yourself!


Tuesday, February 19, 2013

perfect chocolate cupcakes

These are the best!  I meant to post these before Valentines day because they make the perfect treat for a special occasion.  But who needs a special occasion for chocolate cupcakes?
The best part about these...they're really easy to make!  These are my go to quick cupcake for any occasion.  I love them with my usual favorite, cream cheese frosting, (that combo was a hit for Carson's bday party) but they are so tasty with peanut butter frosting (see my recipe below).


INGREDIENTS 
3 cups flour
2 cups sugar
2 teaspoons baking soda
2 teaspoons salt
1 cup cocoa powder (I used this kind)
2 cups milk 
1 cup vegetable oil
2 teaspoons vinegar 
2 eggs
2 cups mini chocolate chips (optional)

DIRECTIONS
Mix all ingredients well (with a mixer or by hand).  It should be smooth and lump free.
Pour into cupcake papers and bake at 350 for 25 minutes or until a toothpick comes out clean. 

PEANUT BUTTER FROSTING
1/2 cup butter
1 cup creamy peanut butter (I'm all for Skippy Natural)
4 cups powdered sugar
1/3 cup milk (or cream) 

Mix butter and peanut butter until creamy.  Slowly add a little sugar, then a little milk (sugar, milk, sugar, milk) until all is added and frosting is smooth.  

This makes about 2 dozen cupcakes.  Eat up!


Thursday, February 14, 2013

Happy Valentine's Day!

I hope everyone's day is filled with lots of hugs and kisses.

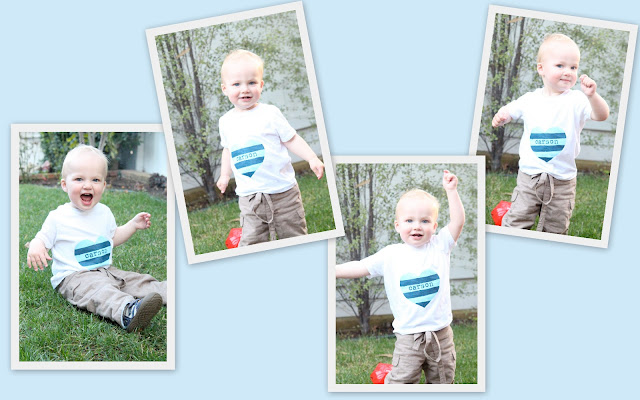
Carson's loving his new Valentine's T-shirt.  He's celebrating with a little dance party!
Here's how Carson painted his shirt himself!

Wednesday, February 13, 2013

sweet little gifts for my littlest sweethearts

I put together a couple of valentine's day gifts for my favorite little guy (Carson) and my favorite little gal (my niece, miss Mari).

These personalized books from Paper Hat Press make a great gift for a special little one.  Mari got "Little Sparkle"
 and Carson got "Little Super".
 The hardbound books have beautiful illustrations and it's great fun to see the your special little one's name, best buddy (puppy Jake is famous) and favorite foods in print!  You even get to choose eye, hair and skin color!

Happy Reading.

Tuesday, February 12, 2013

a messy little valentine

This morning our day took an unexpected turn for the messier.  Carson is very into feeding himself and it makes things pretty interesting.

I couldn't help but have a good laugh this morning...
I may have even joined in a little oatmeal squishing.
I figure anything that makes my guy this happy, is worth a mess!
 
 And, more mess = more fun, so we took the messy opportunity to break out the paint and create Carson's Valentine's day T-shirt.

He's got a date with his auntie on Valentine's (I have to work), so he's got to look pretty handsome.  I haven't had much time to check out the Valentine's attire possibilities out there this year, but it's usually a little tricky to find something in tough guy colors.

So, we took out our fabric paints and got to it.
First I used some paper and drew and cut out a quick heart.
I grabbed one of Carson's old white T-shirts and a nice big box we had laying around.  (We've always got plenty thanks to diapers.com!)

I taped the shirt to the box so it was nice and flat.  I then used my handy elmer's tape runner (it's basically double stick tape, but it's a crafter must-have) and taped right along the heart so it would stick nice and tight to the T-shirt.


The whole shirt was safely covered with tape, except the space inside the heart.
 Carson donned his smock (one of dad's old shirts) and got to creating his masterpiece.
  
This was no where near as messy as I anticipated!  Maybe we have a little artist in the making.
I had originally planned to keep things simple and stop with the painted heart, but it was so quick and easy that we added a little extra!

 I taped off stripes.
 Carson added some blue paint.
I used my favorite stamp set to add his name.


I think he'll make a handsome little valentine!

Wednesday, February 6, 2013

the tastiest red velvet cupcakes in town

Valentine's day is right around the corner!  I bet your sweetie (or your kids/buddies/co-workers) would love some red velvet cupcakes.  I bet they'd especially appreciate some of the best red velvet cupcakes they've EVER tasted!

I served these at Carson's Birthday party and on many other occasions and they are always a hit!


This makes a huge batch (3 dozen +).  I always seem to need LOTS of cupcakes, but if you need less, adjust accordingly.  I thought about halving it for you, but I think you should probably make the full batch!

INGREDIENTS

  • 4 cups flour
  • 2 tsp. baking soda
  • 2 tsp. baking powder
  • 2 tsp. salt
  • 2 Tbs. unsweeted baking cocoa (I'm a major fan of Ghirardelli)
  • 4 cups sugar
  • 2 cups vegetable oil
  • 4 eggs
  • 2 cups buttermilk (I usually make my own by combining 2 cups milk with 2 Tbs. lemon juice.  Let it sit for 5 mins. and you've got buttermilk).
  • 1.5 Tbs. vanilla extract
  • 2 tsp. white vinegar
  • 1 cup brewed hot coffee
  • red food coloring (I love this food coloring, a little goes a long way)

DIRECTIONS

  • preheat oven to 350
  • combine flour, baking soda, baking powder, cocoa and salt
  • in the bowl of your mixer (or a large bowl) combine sugar and oil.  Add eggs, buttermilk and vanilla and mix until combined
  • stir in the coffee and vinegar
  • add food coloring to reach desired color
  • slowly add dry ingredients to wet ingredients a bit at a time, continually mixing
  • pour/spoon the batter into cupcake tins (lined with your baking cups of choice)
  • bake for about 20 mins. (until a toothpick comes out clean)
  • let cool completely and frost with your favorite icing (I recommend cream cheese, here is my recipe!)
 I hope your sweeties enjoy these!

Oh, and if you're a richer chocolate fan, I'll post my chocolate cupcake recipe next!

Monday, February 4, 2013

the EASIEST diy growth chart

I've got another growth chart for you!  This one is so fun and easy to make.  In fact, I recently gave it to one of my best girlfriends as a baby shower gift and I feel a little guilty writing about how easy it was to make her gift!  Not to worry, I've got plenty more gifts for the sweet little man on the way.

I'm so glad that Rosanna from Little Acorns By Ro found my blog a few weeks ago!  She makes vinyl decals to help with DIY growth charts and she sent me a set to try out.  THEY ARE AMAZING!!  No exaggeration, this growth chart took me 30 minutes of hands-on time!  Don't get me wrong, I still love my vintage growth chart, but this is perfect for those that aren't as into the shabby chic look (and definitely those pressed for time!).
I started with an 8 foot 1"x8" poplar board (you could go with a 6' board if you're not adding a name at the top, or if you want it a little shorter ~ I cut the board to 6'4" to accommodate the name at the top).  You can use any type of 1"x8" (the straighter the better).
I sanded the board for a couple of minutes until it was nice and smooth, then wiped away any dust.
Next, I gave the board a quick coat of stain.  I wanted it to be a nice medium brown color (not too light, not too dark).  I went with Minwax English Chestnut.  I rubbed it on with an old rag, left it on for five or so minutes, and rubbed it off.
After staining, the board needs to dry for 72 hours (so if it's a gift, you need to plan ahead a little).
I can be a little impatient, but I did wait the full 72 hours!  Once fully dry, you're ready to apply the decals.
I measured it out so it would hang 8 inches off the ground.  I marked 4 inches from the bottom of the board on each side, then continued to mark each side every 12 inches.  So, I marked 4", 16", 28", etc.  My growth chart goes to 6'8", which probably isn't necessary for everyone.  The family I made it for happens to have a seriously tall daddy, so I needed it tall!  If you want it shorter, you could make your first mark at 6" (it would then hang 6" off the ground and go up to 6'6"), or even make the first mark at 8" (it would then hang 4" off the ground and go up to 6'4").
After marking both sides of the board, it's time to apply the decals.  I was a little nervous, but this could not be simpler!  The set comes with six sets of 1 foot measurement marks and the numbers 1-6.  Each decal has two sides, one with a grid and one without.  You simply remove the grid paper, and carefully apply it right where you've marked.
I used a little spatula and a bit of pressure to make sure the decal was stuck tight.
After peeling off the paper, you've got perfect measurements!
The measurement marks alternate sides with the numbers right in the middle.
Perfect!
I think it makes a perfect baby shower gift!